WordPress offers unlimited styling options. All there is to do is spend a little time on the admin panel, make some adjustments here and there, save it, and you are done.
The same thing goes for the menu as well. You can add, edit, and even make custom menus in WordPress. Your website becomes neater and better user-friendly. But it’s essential to know the correct way or else you may mess up your entire site.
In this writeup, we will guide you through each step on how to edit the menu in WordPress.
How to Edit Menu In WordPress
This section explains the easiest ways to edit the menu in WordPress:
1. Creating a New Menu on WordPress
For adding a new menu instead of editing the existing one, follow the steps below:
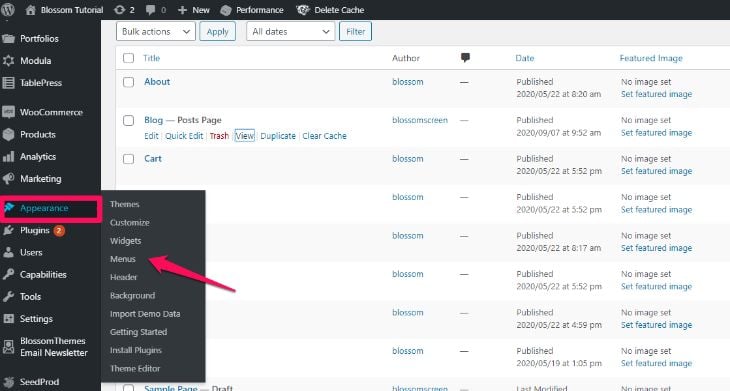
- Log in to your WordPress dashboard.
- Go to ‘Appearance’ and click on the ‘Menus’ option.
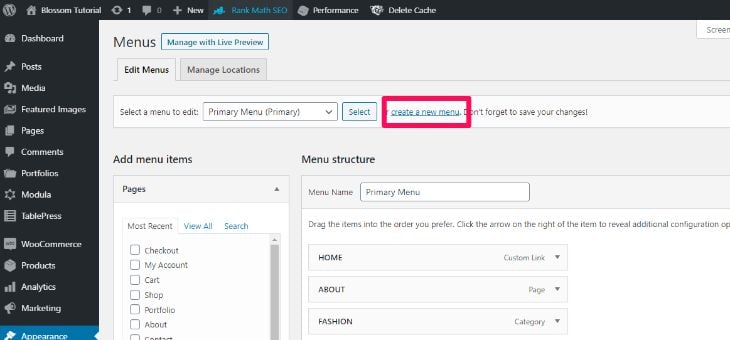
- If you want to create a menu instead of editing the existing menus, click on the ‘Create a new menu link.‘
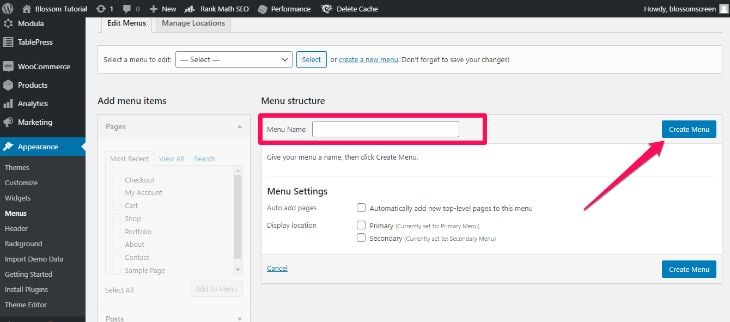
- Assign a relatable name to your menu and click on the ‘Create Menu’ button.
2. Add Buttons To Your WordPress Menu
- You can see the ‘Pages’ section on the left side.
- Select the category to your menu. Check the box next to the option.
- Click on the ‘Add to New’ button below.
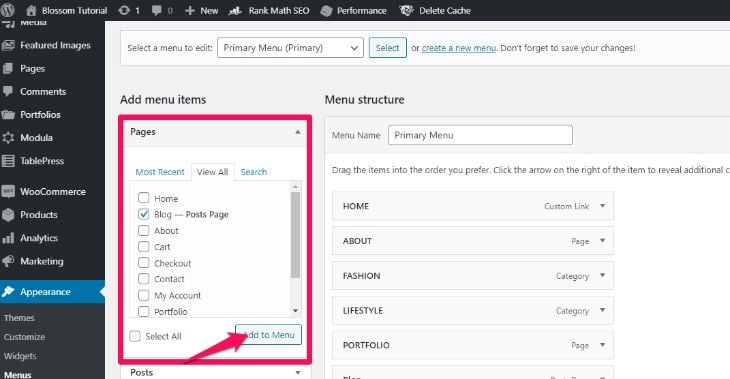
- The section appears on the right side of the screen.
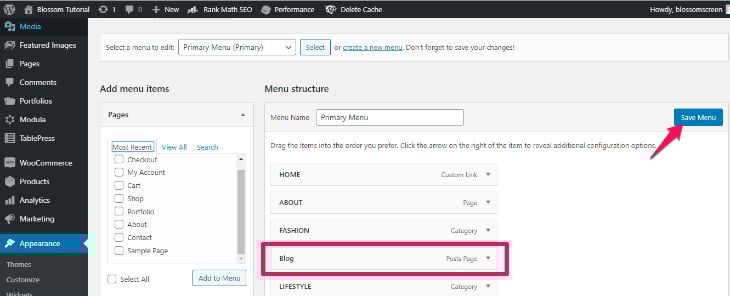
- Click on the ‘Save Menu’ button.
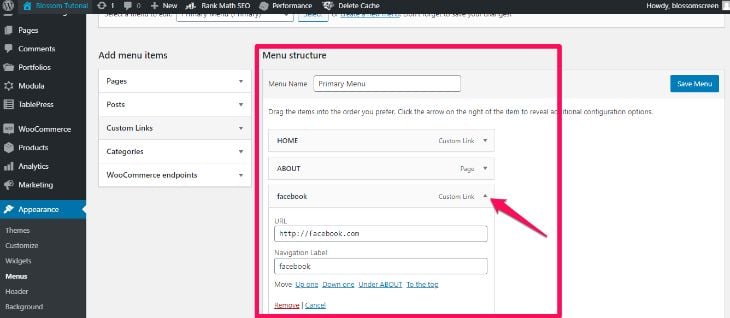
3. Editing the Menu Button in WordPress
After you create the menu, it appears on the right side of the screen.
From here, you can edit the button and how it behaves. Here is how:
- You can arrange the order of the menu as you like. Drag and drop the menu section up or down to assign the position.
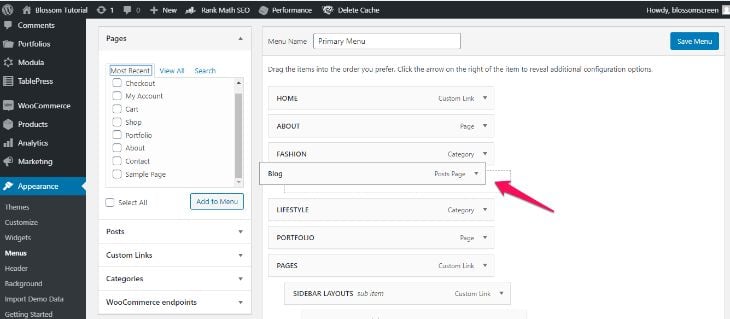
- You can see a drop-down button on the right side. Click on it to reveal additional options for the menu.
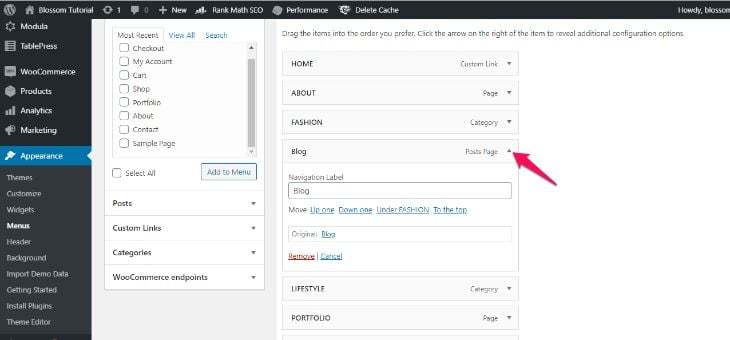
You can notice various fields when you click on the drop-down button:
- Navigation label: This field is for typing in the name for your menu button.
- Title attribute: It is a text that shows up in a tooltip wherever a visitor hovers over the menu item. It is not a mandatory field. However, it does make your site search engine-friendly.
- Link target: You can choose the link that opens up after clicking the menu button. You can choose between ‘New window or tab’ or ‘Same window or tab’ options.
- Remove: This option removes the menu from the list.
4. Creating Sub-menu in WordPress
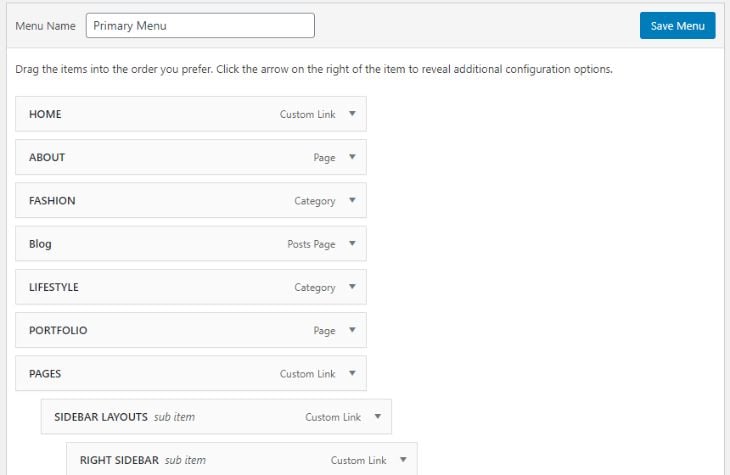
The menu you create becomes primary by default. You can set it to secondary by dragging the menu slightly towards the right and releasing it.
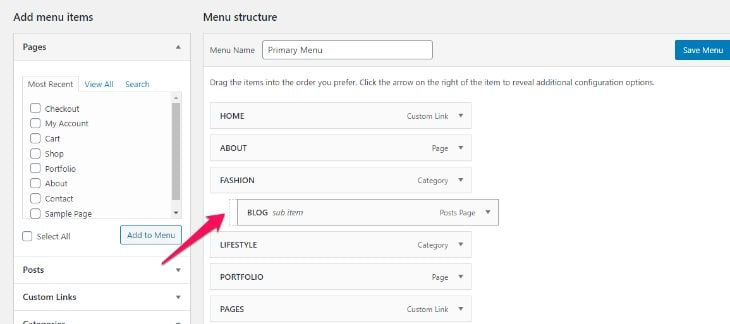
This will make the menu you dragged as an option under the menu above it. The ‘Blog’ menu becomes the sub-menu of the ‘Fashion’ menu in the above case.
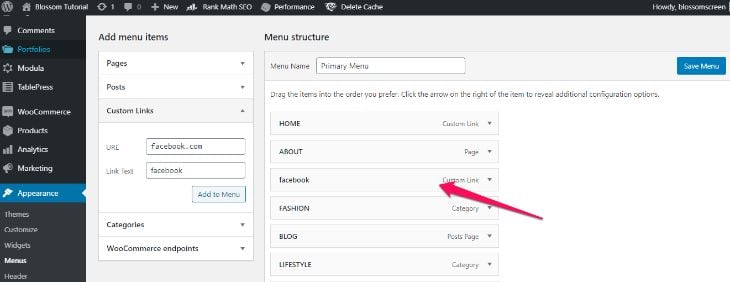
5. Adding Link To The Menu In WordPress
For adding a link on your menu option that opens another page or website, follow the steps below:
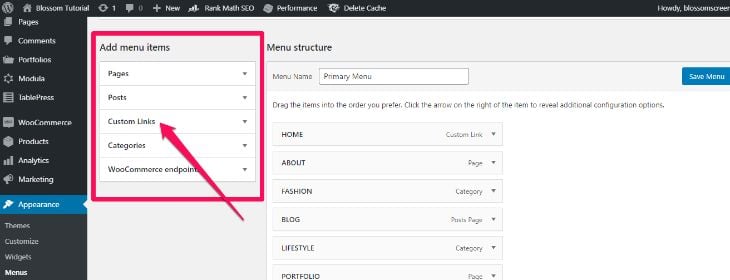
- Go to the ‘Add menu items’ section.
- Click on the ‘Custom Links’ option in that section.
- After clicking the drop-down button, the following section appears:
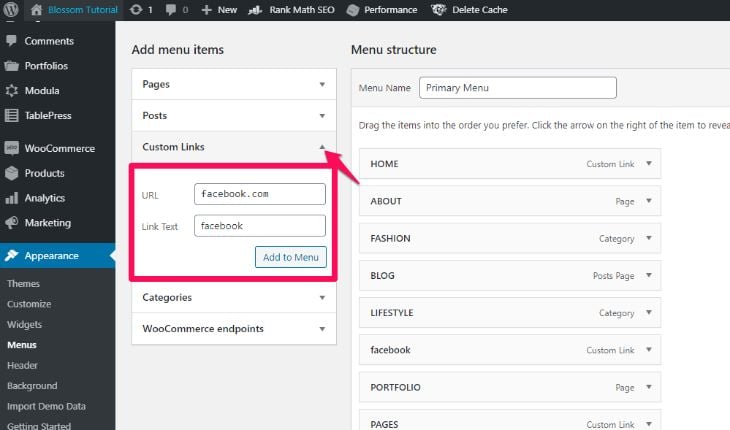
- In the ‘URL‘ tab, paste the page’s web address to open up when clicking the menu.
- In the ‘Link Text’ tab, enter the name for the link that you want to add on the menu.
- Click on the ‘Add to Menu’ option to save the changes.
- The menu now appears on the right side of the screen. You can position it as you want.
6. Editing Menu Settings
You should see a section named ‘Menu Settings’ as follows:
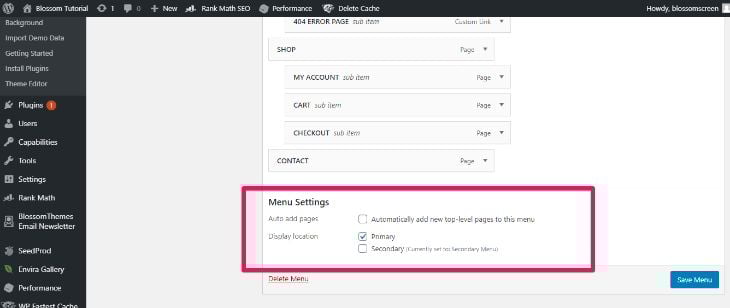
From here, you can set WordPress to add pages automatically and edit the display location of the menu. Check on the box and save the changes.
How To Delete and Rename Menu In WordPress
Sometimes, you may also want to delete the menu or rename it. Here is how you do it:
- Click on the menu that you want to rename or delete from the ‘Menu Structure’ section.
- Click on the drop-down button on the menu tab.
- If you want to rename the menu, click on the ‘Navigation Label’ section and type in the new name.
- If you want to delete the menu from your WordPress, click on the ‘Remove’ link at the bottom.
- Save the changes.
Wrapping Up
So, these were the easy steps on how to edit the menu in WordPress. We hope that now you can add, edit, and remove menus on the go. It is effortless once you know the proper way.
Go ahead and try it out.
Also, check out our articles on How to Add a Blog to Your WordPress Site.

