So you have your WordPress website ready. Great!
Now you need to add a blog to your WordPress site to launch your site. The blog can be an introduction to your site, your business, your agenda, or any other topic related to your site. There are many ways to do so in WordPress.
In this article, we will provide you a step-by-step walkthrough on how to add a blog to your WordPress site.
Don’t worry if you are not tech-savvy. These steps are as effortless, even for a beginner.
How to Add a New Blog to WordPress ?
Here are some easy ways to add a blog to your WordPress site:
1. Add a New Page In WordPress
Since you are at the starting phase of your website, you need a blog to get your site live. You can create a new page in WordPress in the following ways:
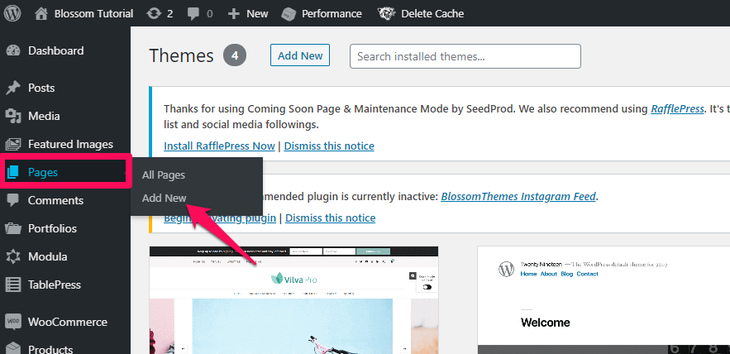
- Log in to your WordPress dashboard.
- Navigate on the left side panel and look for ‘Pages.’
- Click on it.
- Now click on the ‘Add New’ option.
2. Name The New Page
- The above step opens up a page where you can add content for your blog. At the top, you can see the ‘Add Title’ section. Here, type the name of the page you created.
- Type the name as ‘Blog’ since this will be the main page for all your blogs.
- This page is not a static post. It will act as a feed for your posts. Leave the text field blank.

3. Publish The Page
- Once you have set the page’s title, you need to publish the page on your site.
- Click on the ‘Publish’ button at the top right corner of the page.
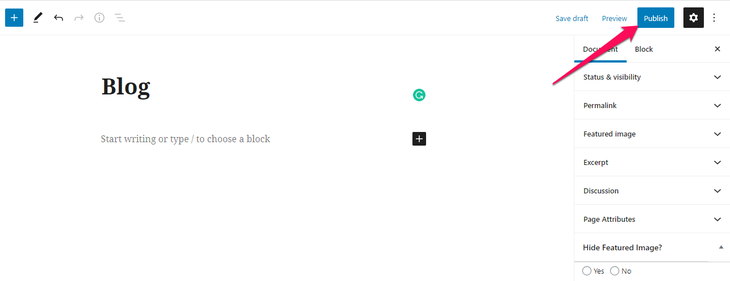
- This saves the ‘Blog’ page on your WordPress database.
- Now you have a page that redirects to your blogs.
- You need to assign that page as your blog page.
4. Designate a Post Page
- Scroll down to ‘Settings’ on the left side panel of the dashboard.
- Click on the ‘Reading’ option from the list.
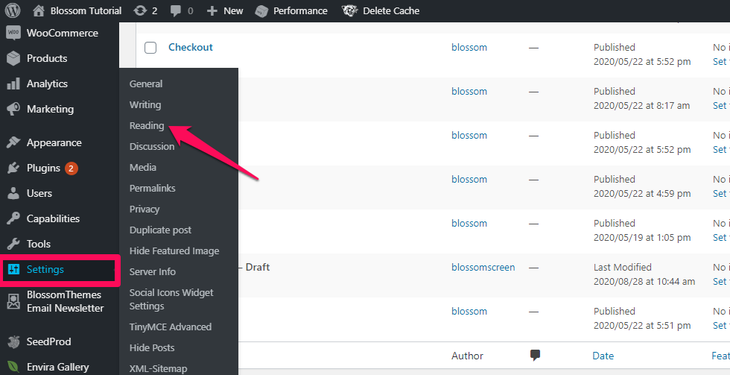
- Click on ‘A static page.’
- You should see a ‘Posts Page’ drop-down list. Select ‘Blog.’
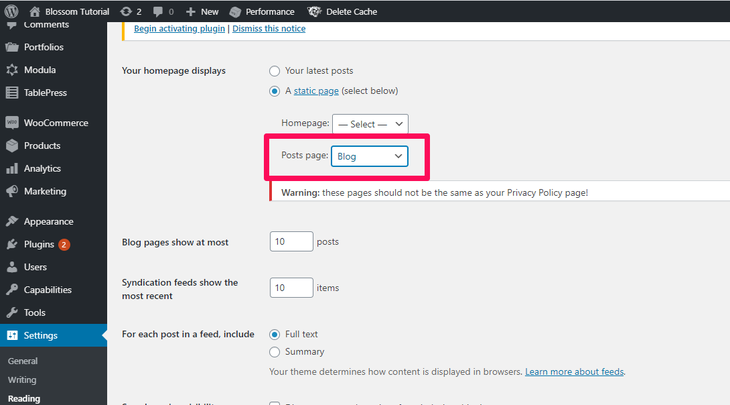
- This step is necessary if you don’t want your blog page as your website’s landing page.
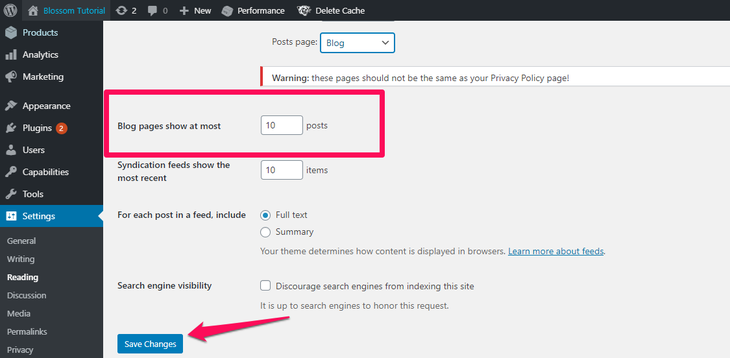
5. Set The Number Of Posts To Display
- Set the number of posts to display according to your preference.
- You should see an option that says ‘Blog pages show at most.’
- Set the number you want.
- Save the changes once you are done.
You have successfully created a new blog page. Now you are ready to publish quality blogs on your website.
Add a Blog Link on Your Website’s Navigation Panel
Adding a blog link helps your visitors find your blogs easily using this link.
Here is how you do it:
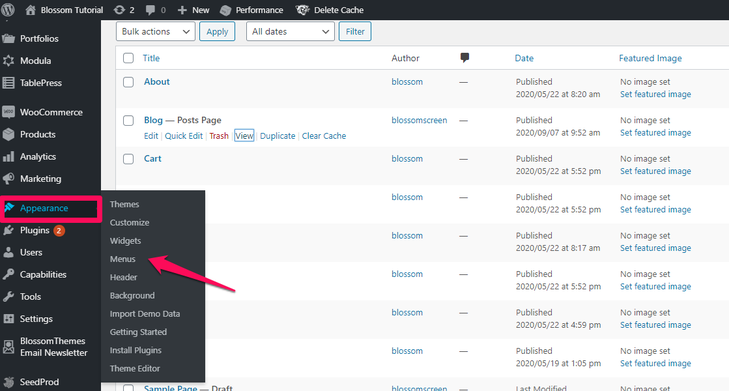
- Log in to your WordPress dashboard.
- Go to ‘Appearance’ and click on the ‘Menus’ option.
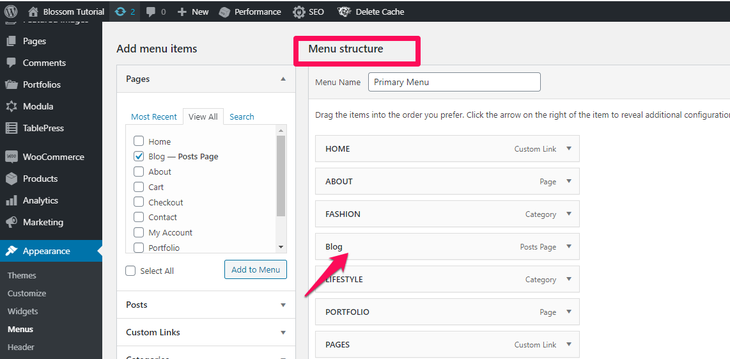
- In the ‘Add menu items’ section, click on ‘View All.’
- You should see an option labeled ‘Blog – Posts Page.’ Check on that option.
- Click on the ‘Add to Menu’ button.
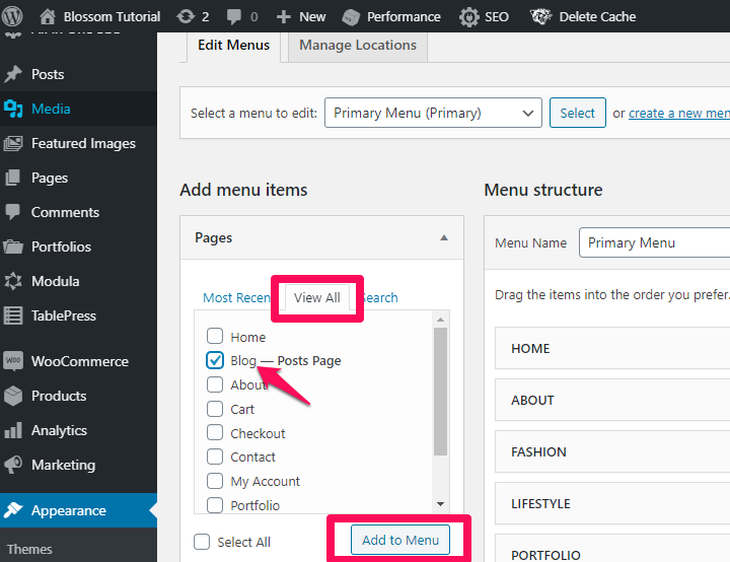
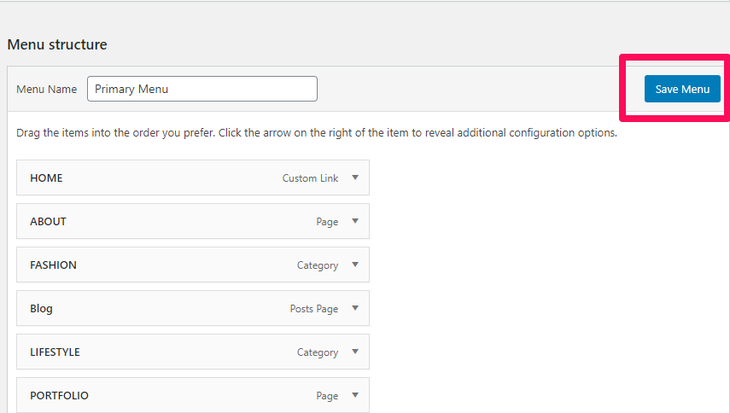
- On the ‘Menu Structure’ section, you should see the ‘Blog’ tile.
- Click on the ‘Save Menu’ button at the top to save the changes.
- Go to your website. You should see a new menu named ‘Blog’ in the top section. Your visitors can easily access your blogs by clicking on this menu.

Tips for Your First Blog Post
Now that you have created the site and blog menu on your website, it is now time to write your first blog. Here are some tips:
1. Introduce Yourself
As this will be your first blog post on the site, it is better to begin with an introductory post. Create a blog with the title ‘About Author,’ ‘Introduction,’ or something similar to represent your website.
You can even create a title that matches your motive, services, and anything related to your motivation to start the site. Creating an introductory post before diving into the regular agenda is a better way to lay the groundwork. This will help your audience know better about your site.
Don’t stress out. Focus on introducing in your own words.
Quick Tip: If you use Google Docs to draft your blog posts, integrate Docs2Site into your workflow. Docs2Site is an export tool that can upload Google Docs files to WordPress with the formatting intact. It saves you up to 1.5 hours per article by eliminating the need to reformat your articles on WordPress. The free version allows you to upload 5 articles per month, so go take a look!
2. Stay Focused
Now that you have added an introductory blog, it is time to dive into the real deal.
You must have figured out a niche for your website before building it, right? It may be products, services, business, or general blogging.
Regardless of the niche, stay focused on that path. For example, if your website is for selling products, you must develop topics to push those products to the market.
Don’t divert away from your niche. It will distract your audience, and your site seems unprofessional. Instead, stick to your primary focus and keep your posts around it.
3. Promote and Share
Social media are much more effective in advertising your product, page, and website. Make sure to promote and share your blogging venture on social media profiles. This helps to bring in more visitors to your site.
Also, make sure to install social plugins on your website. You can even edit the footer in WordPress and add social share buttons. This will allow you and even your visitors to share your site’s content over social media sites.
Ready, Steady, Blog
Now that you know how to add a blog to your WordPress site, you are ready to write out your words. Remember to stay set on your niche, and you should gradually pull visitors.
You can also go beyond the page and posts content to add your custom type. For this, we recommend checking this guide: How to Create a Custom Post Type in WordPress.

