When you create a WordPress website, changing font size becomes an essential feature. You might want to change your header’s font size, overall paragraph, or just a selected element. Either way, knowing how to change the font size in WordPress is always immensely helpful.
WordPress is the most user-friendly platform that makes creating a website effortless. It provides multiple options on how you can change the font size. So in this writeup, we are going to discuss three smart ways to change the font size in WordPress.
Let us dive right in:
1. Changing Font Size Using Theme Settings
You may have one of the best WordPress themes. But if you don’t know how to change the font size in WordPress using the theme settings, the functionality goes down the drain. For reference, you can watch the video below explaining how to change website color and fonts in Blossom Feminine Pro.

The right font size and typography can immediately set up an atmosphere for what your visitors are looking for in your website. It drives them to read your content.
Also, check How to Add Custom Fonts to WordPress.
In this section, we will show you simple ways to use your theme settings to change the font size.
Changing Font Size in WordPress Header
Using the appropriate header size is an effortless way to grab your visitor’s attention. Your content might be excellent, but inconsistent use of headings doesn’t make your website look well-organized. So, follow the steps below to change your font size in WordPress Header:
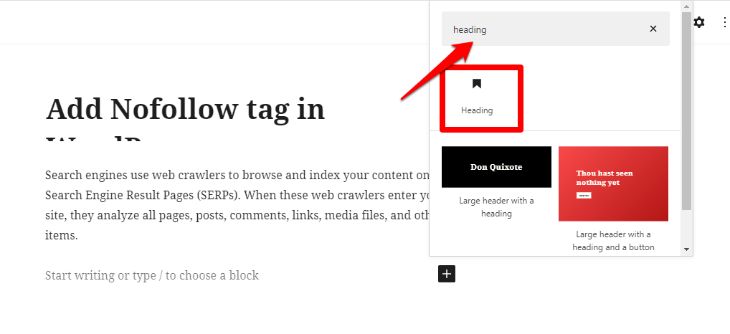
- Search for the ‘Heading’ block in the Common Blocks section.
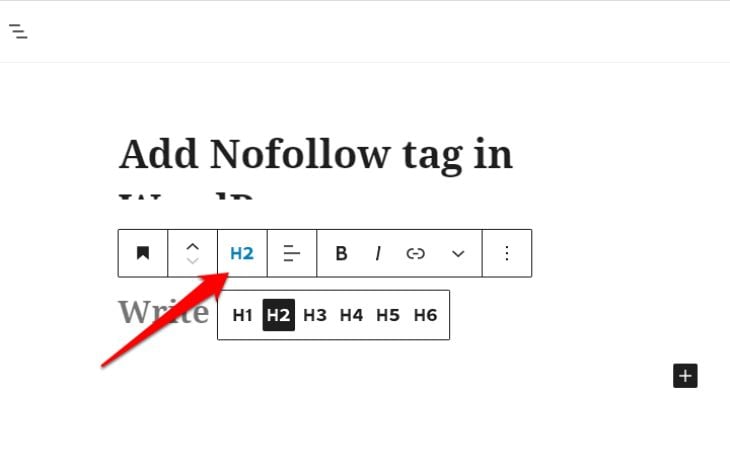
- This block is set to Heading 2 by default. You can use it for your subheadings. However, if you want to adjust the heading size, click on the H2 drop-down tab and choose a different heading size.
- You can even change the heading color from this block.
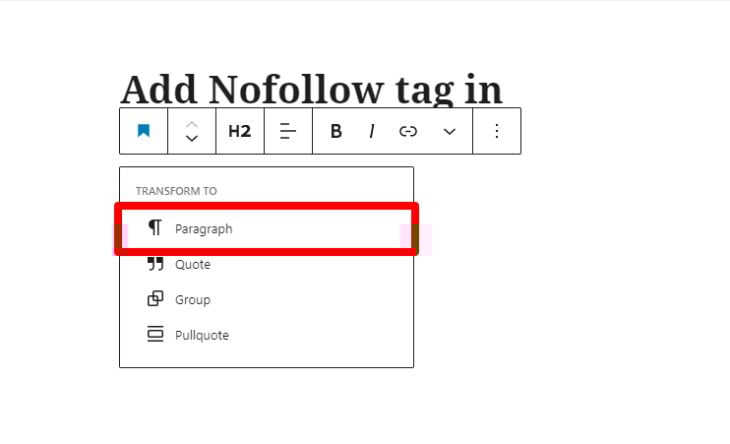
If you are using the classic editor on WordPress, you can change the heading font by clicking ‘Paragraph’ drop-down and selecting the appropriate heading size.
Changing Font Size in WordPress Block Editor
If you want to modify the font size of the whole post or a particular paragraph, there is an easy way to do it. You can use your WordPress default block editor. Most of the themes nowadays have the Gutenberg editor. This page builder makes editing the media-rich posts easier.
Here is how to change the font size using Gutenberg editor:
- Select the post you want to edit or simply click on ‘Add New.’
- Now select the paragraph or the part of the text, of which you want to change the font size.
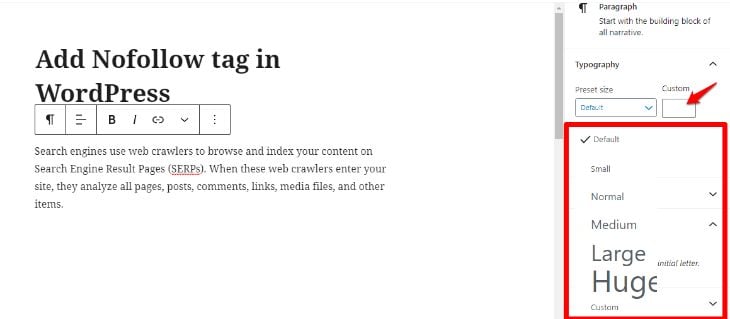
- Select the text size under ‘Text Settings’ located on the right-hand side.

- Drop-down the font size option. Here you will find Small, Normal, Medium, Large, and Huge options. Select the option you prefer.
- You can also manually set the text size number.
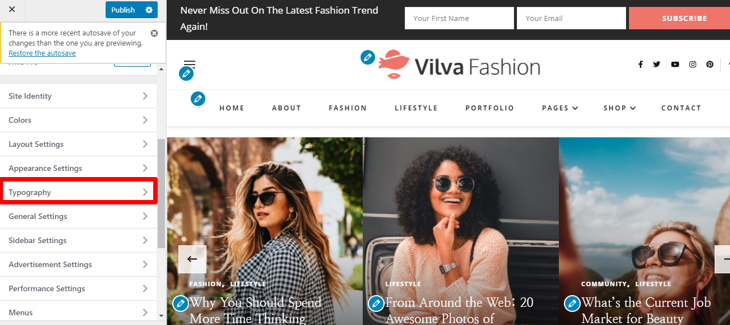
There is an alternate way to change font size using your WordPress theme settings. This method works mostly in premium themes. Here are the steps:
- Go to the Appearance and then click on Theme Options.
- Look for an option like ‘Styling’ or ‘Typography.’
- Under this option, you can find multiple options to change the font size.
- Select the appropriate size you want.
2. Changing Font Size Using Custom CSS
If you cannot change the font size using your theme settings, custom CSS might be another way to do it. However, this way is a bit more tricky than the above method.
Using the custom CSS, you can easily change the font size of the whole post and keep the changes permanent for new posts as well. You need to add a few lines of codes in this method. It is better to consult your theme developer or review the document before proceeding to the custom CSS method.
Also make sure to backup your current CSS file before making any changes. We recommend using a staging website.
Follow the steps below to change the font size using custom CSS:
- Go to your theme’s dashboard.
- Click on ‘Appearance’ and then on ‘Customize.’
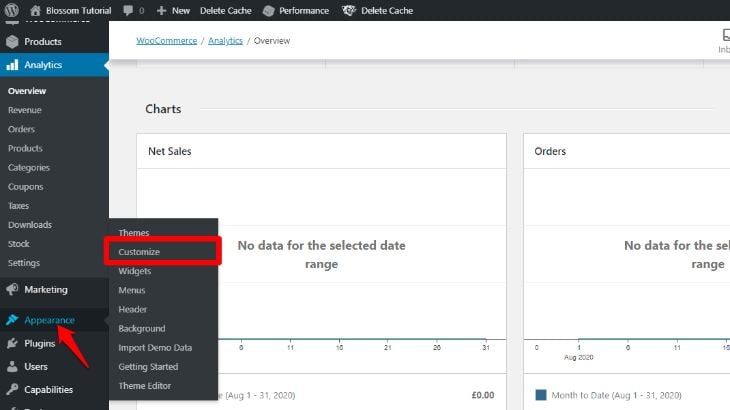
- Scroll down and click on ‘Additional CSS.’

Now you need to add the following codes in the box on the left-hand side:

For Changing The Entire Font Size Using Custom CSS
body {
font-size: 1.25rem;
}
For Changing The Paragraph’s Font Size Using Custom CSS
p {
font-size: 25px;
}
For Changing Specific Heading’s Font Size Using Custom CSS
h2 {
font-size: 2.5em;
}
For Changing Sidebar’s Font Size Using Custom CSS
.sidebar li {
font-size: 12px;
}
For Changing Footer’s Font Size Using Custom CSS
.footer {
font-size: 150%;
}
For Changing Specific Screen Font Size Using Custom CSS
html {
font-size: 18px;
}
@media (min-width: 900px) {
html {
font-size: 20px;
}
}
Custom CSS editing allows four different units to measure the font size:
1. Em (em): This unit is mainly used in web media documents. 1em equals 12 points.
2. Pixels (px): This unit is mainly used in screen media. 1px equals to 1 dot on a LED/computer screen.
3. Points (pt): This unit is used for traditional printed media. 1pt is equal to 1/72 inch.
4. Percent (%): The default value for this unit is 100%. This value changes after zooming in and out.
3. Changing Font Size Using WordPress Plugin
The final method to change the font size in WordPress is by using a WordPress plugin. The reason we have included this method in the last place is that plugins bloat your website. They add extra code to an existing set of programs. Plugins increase the number of code loading on each page, thus increasing the loading time.
More the loading time, more are your chances of losing visitors on your site. A study also shows that 52% of WordPress vulnerabilities are due to plugins. So, How many plugins are too many?
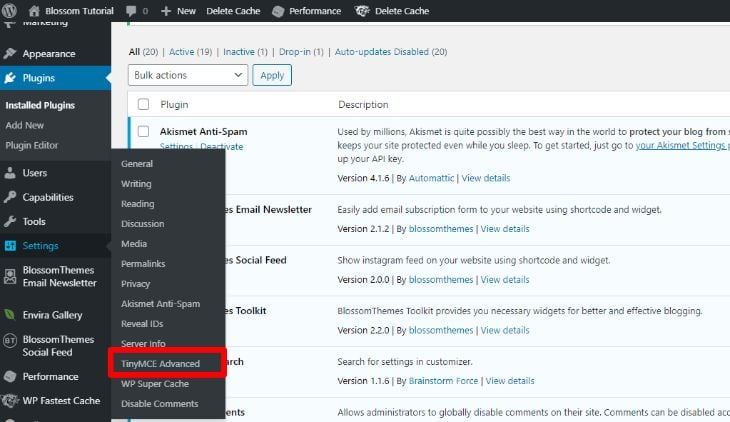
If you have considered going on with this method, you need to install a plugin named TinyMCE Advanced. This is a popular plugin in the market for changing the font size. Now, you can follow the steps below:
- Login to your WordPress dashboard.
- Go to Plugin and then click on Add New.
- You will find a search bar on the top right. Type “TinyMCE Advanced.”
- Click on ‘Install’ to install the plugin.
- Click on ‘Activate’ to activate the plugin.
After activating the plugin:
- Go to the Settings page on your WordPress Dashboard.
- Click on ‘TinyMCE Advanced’ plugin.
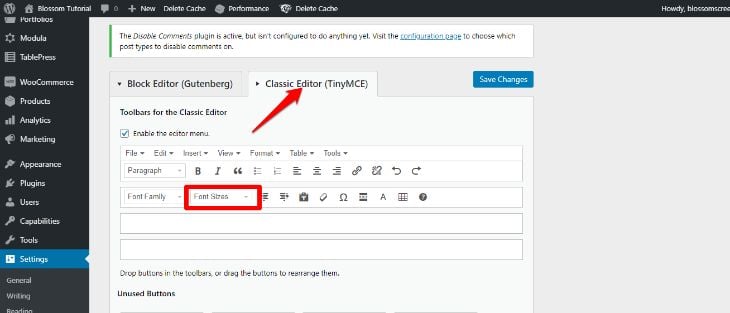
- Here you will find two different tabs – Block Editor (Gutenberg) and Classic Editor (TinyMCE).
- Click on Classic Editor (TinyMCE) and enable the editor menu.
- Move the Font Sizes drop-down by dragging it upwards.
- Save the changes.
- After you have saved the changes, create a new post, or edit an existing one. You will now notice a classic paragraph editor.
- Select the texts you want to adjust and choose the font size you want on the editor.
TinyMCE Advanced plugin will also add a lot of new options and features on your WordPress. These features will help you to upgrade the visual appearance of your website drastically.
Final Verdict (The Safest Way To Change Font Size in WordPress)
The most sustainable and safest way to change WordPress’s font size is using the theme’s settings. In case the theme you are using does not have this option, we recommend changing the theme.
If your WordPress theme does not have this basic feature, who knows what other essential features might be missing?
So for this, you can opt for Blossom Themes. Blossom themes consist of themes in various niches like blogging, magazines, coaches, charity, travel and many more.
You can opt to use plugins and custom CSS as an alternative method. Choose the option that suits you the best.

