
Adding testimonials is a powerful and effective technique to improve site experience. It shows social proof and helps to build trust and provides authority to your site.
Testimonials provide a reason for your new visitors to stick around on your site. Moreover, adding testimonials of your happy clients or readers helps to increase the conversion rate. You can even use testimonials to promote your products and services. No wonder you can find many online businesses using testimonials on their websites.
However, adding and managing testimonials can be tricky if you don’t know the proper way.
In this article, you’ll learn how to add testimonials in WordPress.
Why Add Testimonials in WordPress?
Like mentioned earlier, adding testimonials provides social proof to your visitors. It is like a customer’s review of your website. Such reviews have a more significant impact on your site’s conversion rate.
A study shows that adding customer testimonials is the most effective tactic in content marketing. Another study shows that 90% of buyers need online reviews to influence their decision. Similarly, many people need up to ten reviews before they can trust a business.
Adding testimonials is a better way to show your new visitors that you have satisfied customers. Moreover, it provides a reason for your visitors to trust your brand.
Here are some of the key elements you need to remember to get the best result from adding testimonials:
- Focus on positive statistics: Whenever you post a testimonial, make sure to include only the positive ones. You can add some feedback as well. However, avoid negative information as it can repel your potential clients.
- Add pictures along with the words: The proverb “A picture is worth a thousand words” stay true for testimonials as well. A testimonial is more believable when you add a picture to it.
- Use stories rather than plain texts: Adding a story is more persuasive for conversions rather than plain text.
- Collect testimonials: Wait for your website to receive multiple testimonials from multiple visitors. Post them when you have a handful. A few testimonials seem odd, and your website seems rather new to get involved with.
- Highlight authoritative figures: If a well-known name has left a few words on your site, it is best to show it off on your site.
How to Collect Compelling Testimonials?
To learn how to add testimonials in WordPress, you need to pile up testimonials first. Here, we will give a few ideas on how to do that.
Collecting testimonials is doable art. With the right platform and technique, you can receive a good number of testimonials. A few platforms to encourage testimonials can be Facebook, Instagram, YouTube, LinkedIn, and local search directories.
You can even reach out to your visitors via email. Whichever platform you decide to use, ask questions so that the result is always compelling for the customers. Experts recommend asking the following six questions for a better testimonial:
- What was the obstacle that would have prevented you from buying this product?
- What did you find as a result of buying this product?
- What specific feature did you like most about this product?
- What are the three other benefits of this product?
- Would you recommend this product? If so, why?
- Is there anything you’d like to add?
These six questions will help you gain better testimonials from your customers and convince new visitors to get involved with your site. Make sure to collect photos as well, and you have yourself a buffet of compelling testimonials to showcase.
How to Add Testimonials In WordPress?
After you have collected an ample number of testimonials, you can now add them to your WordPress. Here are the three easy steps to add testimonials in WordPress:
Step 1: Add a testimonial plugin.
A good testimonial plugin enables you to add and manage the reviews with ease. You can set it throughout the website as you want. Using a plugin also spares you the time and effort to keep track of the same customer profile over multiple pages.
We recommend using the ‘Strong Testimonials’ plugin. It is frequently updated and has received more than 100,000 active installations. It is simple to use, even for a beginner and offers multiple features. We will show you how to get on with this plugin.
However, you can also use other plugins, such as Easy Testimonials or Handsome Testimonials.
- Log in to your WordPress dashboard.
- Scroll on the left side panel and look for ‘Plugins.‘ Click it.
- Now click on the ‘Add New’ option.
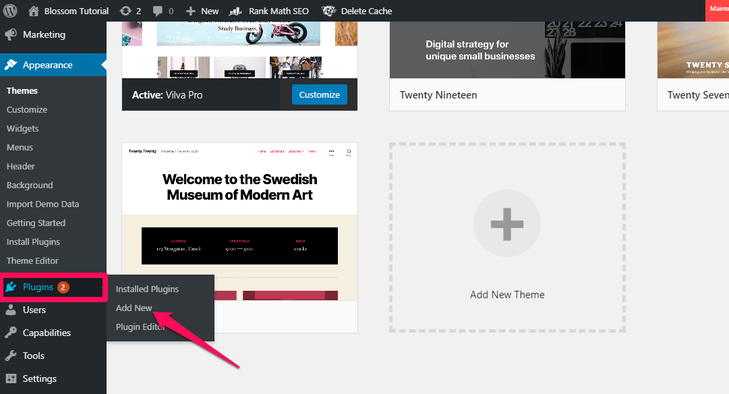
- You can see a search box on the top of the page.
- Click on it and type in ‘Strong Testimonials.‘
- The plugin shows up. Install and activate the plugin.

- You have successfully installed the plugin.
- Move on to step 2 now.
Step 2: Set up the plugin and add testimonials.
Now that you have installed and activated the plugin, you can add testimonials. Here are the steps to do that:
- Navigate the left sidebar of the WordPress dashboard. Look for ‘Testimonials.‘
- Click on it and select hit the ‘Add New’ button at the top.

- A new page opens. Here, you can add the testimonial title, main review of the customers, their information such as name, and their picture as a featured image of the testimonial.

- Save the changes once you are done.
- Click on the ‘Publish’ button at the bottom right corner.
Here are a few tips to add a testimonial:
- Give a title to the testimonial that reflects the best aspect of the review.
- Add a full review as the main content.
- Add information about the person who gave that review. Make sure to take your customer’s consent before posting personal information about him/her.
- Add a photo of the customer. You can ask for it while collecting the testimonial. Make sure to size the picture square for consistency.
- If you don’t have the picture, you can set their email. This will enable the plugin to search if your customer has an image on Gravatar. But again, you need the customer’s permission.
Repeat the above steps for each testimonial.
Step 3: Style your testimonials.
Now that you have added testimonials in WordPress, you should style them to make your site visually compelling. We will teach you to create simple testimonials. Follow the steps below:
- Click on ‘Testimonials’ on the left side panel of the dashboard.
- Go to ‘Views’ and click on the ‘Add New’ button at the top of the page.

- Type in a title for the style you are going to create.
- We will give it a masonry style, so we are setting the title to ‘Masonry Style.’

- You can select the order as well as the number of testimonials to display on your site.
- Scroll down and go to the ‘Fields’ section.
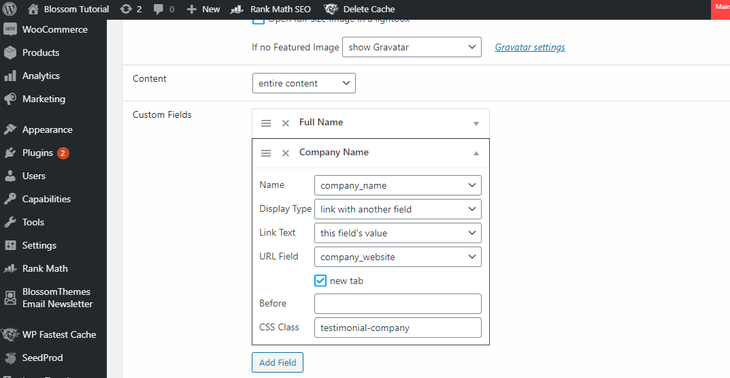
- In the ‘Featured Image‘ option, you can see ‘If no Featured Image.‘
- Select ‘Show Gravatar‘ from the drop-down option.
- In the ‘Custom Fields,’ you can add the company name by clicking on the drop-down arrow.
- Click on ‘Add Field‘ after you are done.
- Scroll down to the ‘Layout’ section.
- Select ‘Masonry’ from the options.
- You can even set up the number of columns if you like.

- Make other adjustments if you want from the available sections.
- Click on the ‘Save Changes’ button at the bottom after you finish setting up the style.
- A shortcode appears at the top of the page.
- Copy it.

- Look for ‘Pages‘ on your dashboard and click on ‘Add New.‘

- Give the title name as ‘Testimonials.‘
- Paste the shortcode in the text box.
- Now click on ‘Publish.‘

- Preview the changes you made.
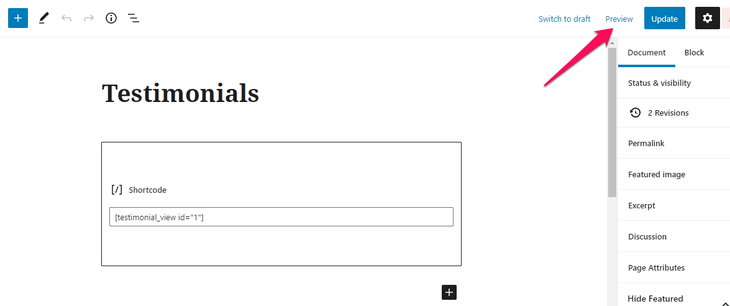
- You should see the new testimonial you just added.

- To add new testimonials, repeat the above steps.
Note: You can go back to Testimonials > Views and edit the testimonials’ style on your site. You can change the color, background, style, font, and many more. Try it out.
FAQs (Frequently Asked Questions)
1. How do I add testimonials to my website?
You can add testimonials to your website in three simple steps:
- Add a testimonial plugin.
- Setup the plugin and add a customer’s testimonial.
- Style the testimonial you just added.
- Publish it once you are done.
For each testimonial, repeat these three steps. We have provided a detailed guide above. Read to know more.
2. How do I edit a testimonial in WordPress?
After installing and activating the ‘Strong Testimonials’ plugin, add a testimonial. Go to Testimonial > Views. Here you can edit the testimonial as you like. You can add different style, font, color, background, transitions, the number of testimonials to be displayed, and much more.
Words of Wisdom
Testimonials help your site and business run a long way. No matter the type and purpose of your website, testimonials are essential. They are social proof that introduces you better in the words of your clients. Testimonials help to develop a visitor’s trust on your website. They help to boost your conversion rate. Moreover, your new visitors can know what benefits to expect from you.
We have just guided you with the proper steps to add testimonials in WordPress. Also, We recommend you to check How To Add Free Live Chat in WordPress. We hope you found it helpful. Feel free to leave any query regarding WordPress testimonials in the comment section below.

