
Being unable to upload your favorite files of large sizes can block your creativity and expression limit.
That’s why we went out to find the solution for you and everyone else facing this problem.
In the article below, you’ll learn how to increase the maximum file upload size in WordPress. You can use these methods and alter the maximum file upload size setting.
These methods give you complete freedom to post whatever you want on your website without a hassle of technical hurdles. Doesn’t that sound exciting?
Please continue reading to find out more.
What is the Maximum File Upload Size in WordPress?
WordPress does not allow you to upload files that are bigger than 25MB.
However, this maximum upload file size also depends on the settings that the web host provides. It can range anywhere from 2MB to 150MB.
To know about your website’s current maximum file upload size,
- Navigate to WP Admin-> Media
- Click on Add New button. There you will see the full upload size mentioned at the bottom of the page.
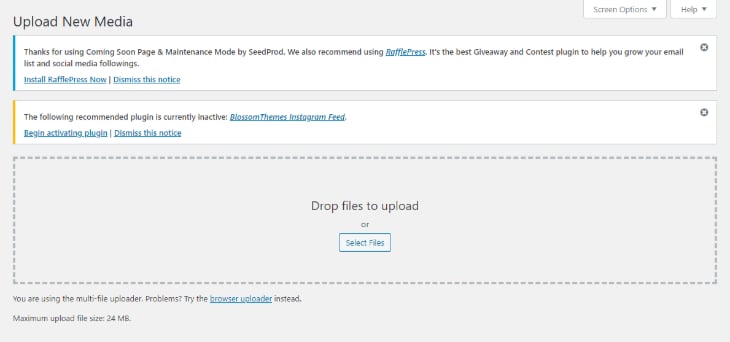
Don’t worry if it’s less than you need. You can always change it with the below-mentioned techniques for increasing the maximum file upload size in WordPress.
How to increase the maximum file upload size in WordPress?
WordPress allows you to customize it extensively. So, you can change the maximum file upload size in your WordPress website as well.
Here’s how:
1. Update .htaccess File
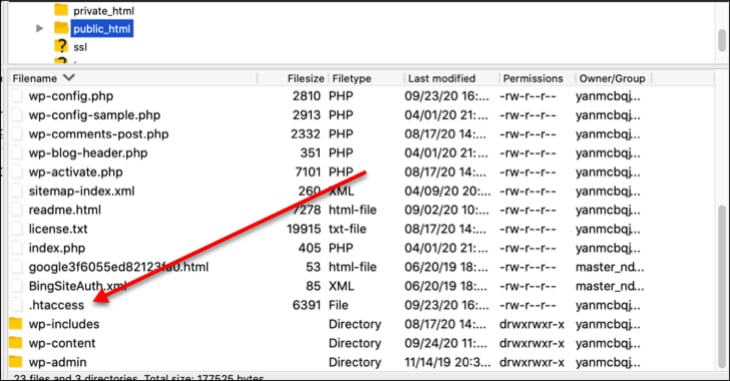
“htaccess” is a configuration file in Apache web servers. WordPress uses Apache, and PHP is set as an Apache module. So, if you want to make changes to the .htaccess file, follow the steps below:
- Connect to the server through an FTP client.
- Navigate to the folder where WordPress is installed.
- Open up .htaccess file you find there using any code editor or notepad.
- Add the following lines.
php_value upload_max_filesize 64M
php_value post_max_size 128M
php_value memory_limit 256M
php_value max_execution_time 300
php_value max_input_time 300
You are free to adjust the number as you prefer. Here, the maximum file upload size is set to 64Megabytes. Your maximum file upload size is now increased, allowing you to upload anything you want.
Before you make any changes to .htaccess, make sure you to backup your website.
2. Edit Functions.php File
Sometimes it’s hard to get access to the .htaccess file. In such cases, you can use the WordPress theme files. Look for the functions.php file of the website and make the following changes.
To locate the functions.php file,
Go to Appearance > Editor, in your Dashboard. You’ll see the functions.php file in the right hand side’s panel and click it. Once the file is open in a text-editor add the following lines of code at the end. Do not forget to update the file.
@ini_set( 'upload_max_size' , '64M' );
@ini_set( 'post_max_size', '64M');
@ini_set( 'max_execution_time', '300' );
These lines of codes set your maximum upload file size limit to 64 Megabytes.
Remember, if you change the theme for your WordPress site, the max upload size will return to its default values. You will need to follow the same process as above to edit the functions.php file then.
3. php.ini Option
You will find a php.ini file in the root directory of your website. It is a file used to configure any application that runs on PHP. Sometimes this file might not be visible. In such a case, you can create your php.ini file and place it in the root directory.
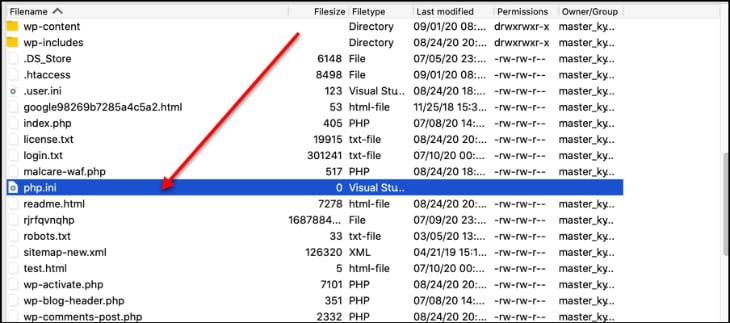
Here’s the code line that you can add to the existing php.ini file or a new php.ini file.
upload_max_filesize = 25M
post_max_size = 13M
memory_limit = 15M
Once you have added the codes to the file, you can again use the SSH or FTP to upload the file in the root directory.
4. Increase Upload Size in Multisite
If you’re a WordPress multisite user, you can change the maximum file upload size setting in Settings. However, you can only increase the size to the limit allowed by server settings.
E.g., if your server limit is set to 5MB and you set 10MB in the network setting, it won’t work. But, if your server limit is set to 20KB, network setting to 15MB, you can increase the file upload size to 20MB. To adjust the settings, follow these steps:
In the WordPress dashboard, Go to My sites > Network admin > Settings.
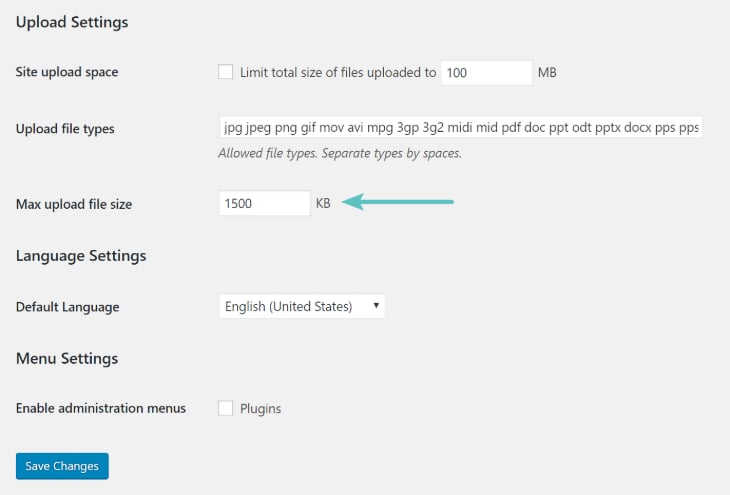
- Check for “Max Upload file size.” Increase it as you like and “Save Changes.”
5. wp-config.php file
There’s another trick you can use to increase the maximum file upload size in WordPress. For this, all you need to do is access the WordPress configuration file.
- Access the WordPress root directory using SSH or FTP and locate the wp-config file.

- Open the file in a text editor. Then, add the following code.
@ini_set( 'upload_max_size' , '20M' );
@ini_set( 'post_max_size', '13M');
@ini_set( 'memory_limit', '15M' );- Save the changes, and that’s it.
6. Plugin Method
Not everyone likes to code or work with website files using FTP or SSH. So, WordPress offers plenty of plugin options that can quickly increase your maximum file upload size limit.
You can simply go to Plugins options in your Dashboard and search for plugins. Once you find a suitable plugin, activate and install it. We recommend you to get the Max upload filesize plugin. This is a simple yet powerful plugin that does just what it needs to do. It increases the maximum file upload size in WordPress without you facing any hassle whatsoever.
To install this plugin,
- Go to Plugins in your WordPress Dashboard and search for “Max upload filesize plugin” in the search bar.
- You’ll see the plugin ready to get installed. Click on install and once it’s installed activate the plugin. Adjust the maximum file size setting in the Upload FileSize setting and you’re good to go. Do not forget to save the settings.
Some other popular examples are WP Uploads, Wp Limits, etc.
7. Contact Hosting Provider
Last but not least, you can always choose your hosting provider to do this job.
Different web hosts provide different packages of services, including the provision to increase the file size upload. Check with your hosting service provider to know if they offer this service. If they do, your problem is solved. If not, you can always use any of the options above. We recommend you to choose Bluehost for your hosting needs.
Conclusion
So, if you’ve ever come across a problem where you couldn’t upload your file because it’s too large, we hope this article came to your rescue.
We have listed all the methods on how to increase the maximum file upload size in WordPress. Choose the one that fits your need perfectly and enjoy building your website with complete freedom.
If you want to read more useful articles regarding WordPress, you can take a look at the following:
How to fix error establishing a database connection in WordPress

